Creative Bible Journaling Techniques
Growing your faith through Bible journaling can be an intensely satisfying experience for beginners and seasoned journalers alike. Starting with something within your comfort zone—stamps, stickers, or pens—is a beautiful way to enhance your personal study of His Word. But, if you’re ready to get a little messy, roll up your sleeves and give some advanced Bible journaling techniques a try. Grab your paints, ink pads, glue, and craft supplies—and get ready to praise Him in fun new ways.
Acrylic Block Stamped Backgrounds
You probably use your acrylic block and stamps every time you journal. Inspiring words and images are so satisfying when accompanying His Word. Did you know there are other ways to use this indispensable Bible journaling tool?
Add a splash of color to your journaling Bible’s margins—or even across the whole page. Creating a colorful background only takes a few steps, and the results are stunning.
Stamped backgrounds create gorgeous marbling you can draw or write over. It’s easy to do and the results are endless. You can use this technique with stamp pads, drops of ink, markers, or watercolor paint. For this art journal tutorial we will use stamp pads, but the steps are similar for each. Too much water may cause the ink to bleed through to the next page, so it may be helpful to practice a few times first.
-
Decide on a theme or color scheme for your background and collect the appropriate ink pad colors.
-
Turn the stamp pad over and press the whole pad onto your acrylic block, dabbing to create a marbled effect.
-
Select your second color and layer it over the top, or create lines or sections of color.
-
Alternate colors as you wish—two or three colors create a wonderful effect, but more may blend too much.
-
Spray the acrylic block with a few light spritzes of water, but be careful not to use too much.
-
Pick up the acrylic block and turn it over slowly, line it up on your page, and carefully place it ink-side-down.
-
Press the block with your fingertips to blend the colors.
-
Pull the acrylic block off of the page.
-
Brush with a paintbrush or use a paper towel to dab excess water from the page.
-
You can spritz and stamp again for a fading effect, or dry the block and stamp it again for more vibrant colors.
Try covering your entire page, stamping only within the margins, creating borders, or highlighting a certain section of the page. If you have a spare Bible mat, you can cover your whole page in one stamp using the same technique. After the page dries, write, draw, paint, or stamp over it. Think of the possibilities—the starry night sky, an anchor in the blue-green ocean, a shepherd’s grazing flock in a peaceful field.
Creating Textures Within Your Journaling Bible
Found objects create interesting textures within the pages of your journaling Bible. Gather items that catch your eye and adhere them to the page. A strip of lace will leave a beautiful texture behind if you dab paint over it and peel it away; glue topped with torn bits of tissue paper offers a colorful background for stickers or paint. Don’t be afraid to experiment! You can always practice an effect on a different piece of paper or in the back of your journaling Bible before committing to a technique.
Bible Journaling with Washi Tape Masking Effects
The simplest masking technique creates straight lines using washi tape. Stick strips of washi tape on your page and paint or create within its border. The mask will help prevent your paints from running onto other areas of the page. Peel off the washi tape when the paint has dried to reveal clean lines.
For more intricate masking, make your own stickers from washi tape with a few simple steps. All you need are washi tape, scissors, wax paper, and a little imagination.
-
Cover a sheet of wax paper with strips of washi tape.
-
Cut out the shape you want to use—Bible journaling stencils can be used to mark the shape if you’re not comfortable drawing freehand.
-
Peel the wax paper backing from the washi tape.
-
Stick your new washi sticker in your Bible journal.
Leave it as it is—or create a masking effect by painting over the sticker. Peel it away after the paint dries to reveal words and artwork.
Make Washi Tape Paper Clips for Your Bible
Create your own washi tape paper clips to mark pages in your Bible and follow your progress through the Word. You can use different colors to identify themes within your journal, or mix and match. There are many ways to create washi tape paper clips:
> Loop a length of washi tape through the small end of a paper clip, stick it to itself, then trim the ends to create a little ‘V’ notch.
> Cut a shorter length of washi tape, loop it around the outside edge of a paper clip, stick it to itself, then cut a notch to create a little flag.
> Cut a longer strip of washi tape, fold it in half and stick it to itself, trim the ends at an angle, then knot the tape at the end of a larger paperclip.
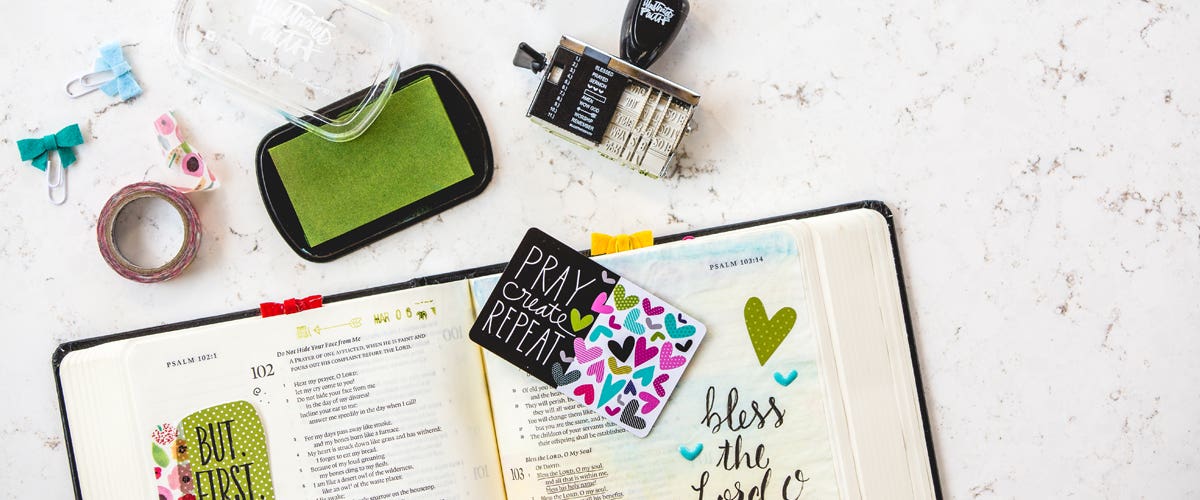
Make Your Own Praise Book with Bible Journaling Cards
You don’t have to use your Bible to create a praise-filled journal. Bible journaling is just as heartfelt in your daily planner or a notebook. Create your own praise book or journaling workbook with the inspiring Bible journaling cards you’ve collected. There are plenty of ways to use journaling cards to grow your faith.
> Use washi tape to adhere a Bible journaling card to a page or at the edge of a page in your favorite notebook.
> Create directly on a journaling card, then slip it into a protective photo pocket page and store the pages in an album so you can look back at your journey later.
> Add a devotional card to your daily planner with washi tape and jot down a prayer as you start each day.
> Create pockets by washi taping bible journaling cards to the pages in a small notebook, decorate the page, and tuck a prayer or special message inside the pocket.
You can even create your own mini notebook using journaling cards as pages. It’s quick and easy, and you can add new cards any time.
-
Gather the journaling cards you want to use, as well as blank paper or index cards cut to the same size.
-
Add a blank page between each of the Bible journal cards for more journaling space.
-
Choose the cards you want to use for the cover, place one on the front and put the one at the end backwards to create the outside cover.
-
You may choose to add washi tape to the binding edge of each card for extra strength.
-
Use a hole punch to punch the cards along one side, careful to leave enough space from the edge so it doesn’t rip.
-
Use loose leaf ring clips to secure the cards in the corner or with two or three rings along the edge.
-
Add more cards and blank pages to the notebook as you get them.
-
You can also use a book binding tool to bind the edge, but this will make adding new pages more difficult.
Now you’ve got a handy little notebook to use as a praise book or Bible journaling workbook. It can be used in the same way as a journaling Bible, but it is a compact solution that tucks away to go anywhere.
When it comes to your personal study of the Bible, anything goes. Journal your study of His Word in any way that speaks to you. Whether that means pens and inspirational word art, or painting an image across the whole page, allow your connection with Him to flourish through your creativity in the Word.
Looking for more Bible Journaling resources? Check out our entire selection of journaling Bibles and supplies. And, for more inspiration, view the Bible Journaling category of our devotional library and sign up for our e-newsletter to receive free articles, updates from our Ecard Studio as well as exclusive deals.